

Post by Lisa on Jan 3, 2010 15:19:44 GMT 10

Art Tutorial: Wallpapers
by Ubiquitous
This issue, we are doing a wallpaper tutorial. It should work for most versions of Photoshop, but you'll need to make some adjustments for Photoshop Elements. Almost all of the images in this tutorial are thumbnails, please click on them for a closer look. We are going to make this wallpaper:

Step One: Create a New Image:
Create a new image by going to File -> New. A dialogue box will then appear. Enter the size you want your wallpaper to be and set the background to white. Most normal screens have a resolution of 1280x1024, and widescreens usually have a resolution of 1280x800, but this can vary. I have chosen to do mine at 1280x800.

Step Two: Find an Image:
I’ve picked up an image of a rider with spurs, to go with the quote I’ve chosen from Briar’s Book/The Healing in the Vines and copied it onto the canvas.

Step Three: Add Curves
We're now going to add a curves layer, to brighten up the icon a bit. To do this, go to Layer -> New Adjustment Layer -> Curves. Here, I've set two dot points - one at (output, input) 43, 79 and the other at (134, 120).


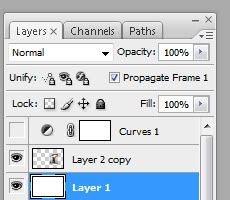
Step Four: Hide Curves
Because we’re going to work with the colours in the image, we need to hide the curves layer so that the colours stay the same as the original picture. To do this, we click on the eye next to the Curves Layer, so that the eye disappears. You’ll notice that the image looks like it was before we created the curves layer. If you can’t see the layers toolbar, go to Window on the main menu and check that there is a tick next to “Layers”
Step Five: New Background Colour
The next step is to change the background colour from the white. We’ll pick a colour using the eyedropper tool. I’ve picked a colour #ededed from the rider’s pants. To put the colour on the background, click the background layer, then click the paint bucket tool and click the background. The colour should change through the whole background layer.


Step Six: Create a Shape
To add a little interest to the image, we’re going to create a shape to put behind it. First we need to go to Layer -> New -> Layer to create a new layer. My layer is in between the background and the image. If it isn’t positioned there, you can reorder the layers by clicking and dragging them into the order you want on the list. Then, using the polygonal lasso tool, create a shape around the image by clicking where you want the points of the shape to be (make sure to return to the first point to complete the shape).
Then we want to right click the inside the outline of the shape and select ‘Fill’ from the list. A dialogue box will appear, and if you click “Colour” an eyedropper box will appear so that we can pick a colour. I chose # 35302d from the saddle area, a darker colour to contrast the light background.


Step Seven: Create Another Shape
Follow the same instructions as in Step Six, but choose a different colour. I chose #c3c2c1 from the horse, which is a shade in between the light background and dark grey of the first shape.
Step Eight: Add Text
For this wallpaper, I’ve used a Tris quote (I don’t care if he rides me with a bit and spurs). I’ve also split it over two text boxes, so that I can create an emphasis on the last little bit. Both parts are the same colour, but different fonts and sizes. The colour I’ve chosen is # b6260b, a red from the shirt, so as to make it really stand out against the neutral tones of the rest of the wallpaper. For the first part (I don’t care if he rides me with a), I’ve used the font Corbel at size 24pt. And for the last bit (bit and spurs) I’ve used Jane Austen font at size 36pt. The script font makes for a good contrast against the other plain font, and the larger size makes it stand out a smidge more.

Step Nine: Rotate the Image
Select the layer with the image of the rider. Then go to Edit -> Transform -> Rotate. Click around the image and drag the mouse to rotate it. I’ve only rotated it a little here, but it can go as much as you like. To set the change, hit the enter/return key.

Step Ten: Add a Brush
Now we’re going to add a little brush, just for flourish. Create a new layer (Layer -> New -> Layer), then pick a colour for your brush. I used the eyedropper to pick a red from the shirt again, but you can use the same red as the text. Then select the brush. I’ve picked one from obsidiandawn.com (from her Swirls II set). To use a custom brush click the little arrow on the brush panel and then select “Load brushes.” Select the brush set you want to use and stamp it in the spot you want. To get the default brushes up again, do the same thing as before, but instead of selecting “Load brushes” pick “Reset Brushes.”


Step Eleven: Show Curves
Click the blank spot where they eye should be next to Curves on the layers toolbar. This should make the eye show up again, and the curves put their effect on the picture. Make sure that the Curves layer is the top-most layer, else it won’t affect the other layers. The finished product should look like this:


 I know I'm going to spend days trying this out!

 Maybe once we'd have seen it during Smackdown!