

Post by wordy on Sept 1, 2010 13:13:12 GMT 10

Art Tutorial
by ubiquitous
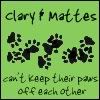
This issue, we are doing an tutorial using brushes and textures. It should work for most versions of Photoshop, but you'll need to make some adjustments for Photoshop Elements. Most of the images in this tutorial are thumbnails, please click on them for a closer look. We are going to make this banner:

Step 1: Create a new image.
To do this, go to File -> New. Set the width to 1000 pixels and the height to 250 pixels.
Step 2: Background Colour:
First, fill the background colour in. Click the foreground colour selector and select the colour #64bad4 (the Goldenlake blue). Then use the paintbucket tool to colour the whole layer in blue.

Step 3: Add texture:
The background, nice as it is, is a little dull, so I've chosen this black and white texture from Foxxie-Chan on DeviantArt (she also goes by wonderland__ on LJ). Copy and paste the texture into the image and set the layer to Linear Dodge at 15% opacity. If you can't see the layers toolbar, go to Window -> Layers (and if that seems to long, I think F7 is the shortcut) and it should appear.


Step 4: Add Text:
Use the text tool to add the text. I've used three text boxes, one for each line of text. The font is Vani, and the colour is #2c2c2c, with the large font at 50pt, and the smaller font at 25pt.

Step 5: Add Brush:
Using the colour swatches, select black as the foreground colour. Go to Layer -> New -> Layer (or ctrl+shift+n) to create a new layer. I've picked a brush from Acme Graphics's Noveau set of brushes. Load the brush by clicking the arrow on the toolbar that appears next to the selected brush type and then selecting 'Load Brushes' from the drop-down menu. Then open the brush file. The brushes will then add themselves to the grid of brushes from which the particular one can be chosen. Click the brush onto the blank layer.


 Maybe once we'd have seen it during Smackdown!